I use a 0.05 ml syringe to spread a thin film of Krytox 205g0 (0.5 cSt) on the inner housing walls, because its low‑viscosity oil fills microscopic gaps and dampens the wire‑to‑plastic clack without adding drag; for the wire I prefer XHT‑BDZ grease (≈2 Pa·s) since its higher viscosity creates a viscous barrier that absorbs impact energy. I clip the stem’s plastic feet, dab a nanoliter of Krytox on each stem side, wipe excess with a lint‑free rag, and verify that total lube stays under 0.5 mg per stabilizer. If you keep these steps, the next section shows how to fine‑tune the feel and silence any remaining noise.
Key Takeaways
- Clip the stabilizer stem to remove plastic feet, preventing the wire from hitting the inner housing.
- Apply a thin, even film of low‑viscosity Krytox 205g0 (≈0.5 cSt) to the inner housing walls and both sides of the stem.
- Coat the wire with a semi‑thick high‑viscosity grease like XHT‑BDZ (≈2 Pa·s) to fill microscopic gaps and dampen impact.
- Wipe away any excess lube with a lint‑free rag; keep total lubrication under 0.5 mg per stabilizer to avoid sluggish feel.
- Test by pressing the key with the cap removed, listening for residual “clack” and adjusting lube nanoliter‑scale as needed.
Why Lubing Stabilizers Stops Rattle
I usually start by noting that rattle originates from the loose wire moving inside the plastic housing, which creates a primary clack whenever the key is pressed; when I apply a thin layer of dielectric grease or Krytox 205g0 to the wire and the inner walls, the grease fills the microscopic gaps, dampening the impact and preventing the plastic‑on‑plastic friction that otherwise produces the ticking sound. This coating reduces vibrations by creating a viscous barrier that absorbs kinetic energy, so each press feels smoother. The same layer improves resonance, meaning the key returns to its neutral position more consistently, because the lubricant equalizes pressure across the stem. Using a syringe to spread a 0.05 ml film guarantees even coverage, and wiping excess with a lint‑free cloth avoids sluggishness. The result is a quieter, steadier keystroke without altering actuation force.
Pick the Best Lubricant for Stabilizer Rattle
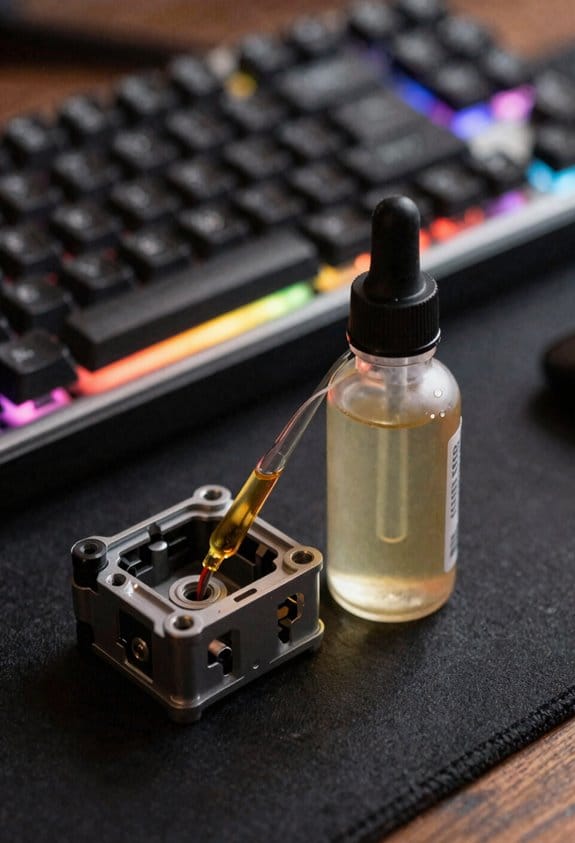
Having shown how a thin layer of dielectric grease or Krytox 205g0 mutes the wire‑impact clack, the next step is to decide which lubricant actually delivers the lowest rattle without sacrificing smoothness. I recommend XHT‑BDZ thick grease for wires because its high viscosity (≈ 2 Pa·s) fills gaps and prevents metal‑on‑plastic chatter while still allowing the stem to glide, but you must avoid over‑application to keep the feel light. For housing and stems, solvent‑free oils such as Krytox 205g0 (viscosity 0.5 cSt) are ideal since they evaporate no residue, stay stable up to 150 °C, and won’t attract dust; they also work with PBT plastic without degrading it. If you need a budget option, a 5 ml bottle of PTFE‑based oil (0.2 cSt) offers similar low‑friction performance but requires a thinner coat to avoid sluggishness. Choose based on the component’s clearance and your desired feel.
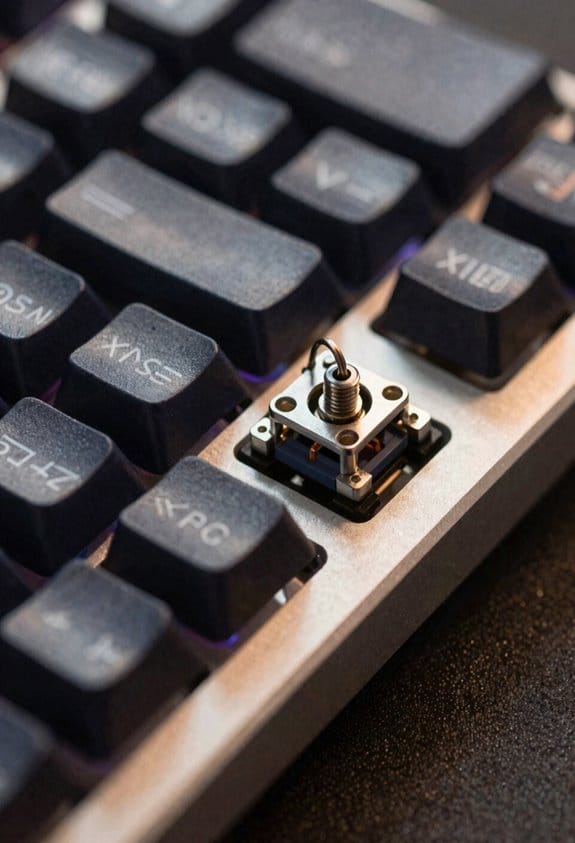
Safely Apply Lube to Housing, Stems, and Wires
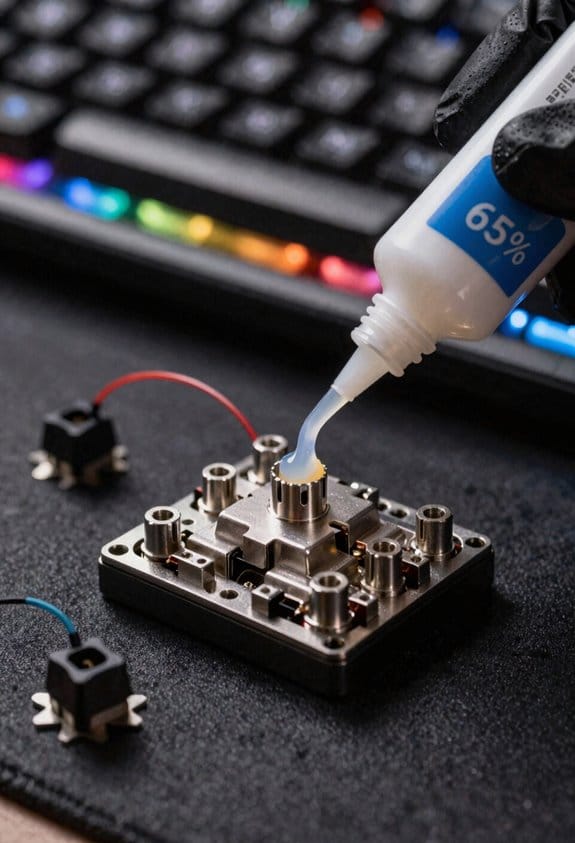
When you start lubing a stabilizer, the first thing to remember is that the housing, stems, and wires each need a different type of lubricant and a specific application method, so you’ll use a syringe or fine‑brush to spread a thin, even layer of Krytox 205g0 (viscosity 0.5 cSt) on the inner walls of the plastic housing, then dab the same amount on the left and right sides of each clipped stempwhile keeping the coating just enough to reduce friction without creating a gummy feel, and finally coat the wire with a semi‑thick, high‑viscosity grease like XHT‑BDZ (≈ 2 Pa·s) by pushing the wire through a small bead of grease before it reaches the 90‑degree bend, ensuring the wire’s movement is dampened but still fluid; this step‑by‑step approach prevents over‑lubrication, avoids dust attraction, and keeps the tactile response light and responsive. I always treat the syringe tip as a precision application tool, wiping excess lube with a lint‑free rag, and I wear nitrile gloves to enforce safety precautions, preventing skin contact with the high‑viscosity grease and reducing the chance of contaminating nearby components.
Common Mistakes That Cause New Rattle (And How to Fix Them)
If you skip the tiny clipping step on the stabilizer stems, the plastic feet that normally dampen the wire’s impact stay intact, which means the wire will hit the housing’s inner wall at full speed and create a noticeable rattle. I’ve found uneven assembly—when one side of the stabilizer sits a fraction of a millimeter higher than the other—creates a gap that lets the wire slam harder, and the resulting noise can be louder than a keycap click. Incorrect seating of the wire inside the stem also leaves space for extra movement, so the wire bounces and rattles. To fix these issues I re‑align the housing, verify that the wire sits flush against the inner wall, and re‑clip the plastic feet, then re‑apply a thin, even coat of Krytox 205g0 to both sides of the stem for consistent damping.
Test and Fine‑Tune Your Stabilizers for Silent, Smooth Typing
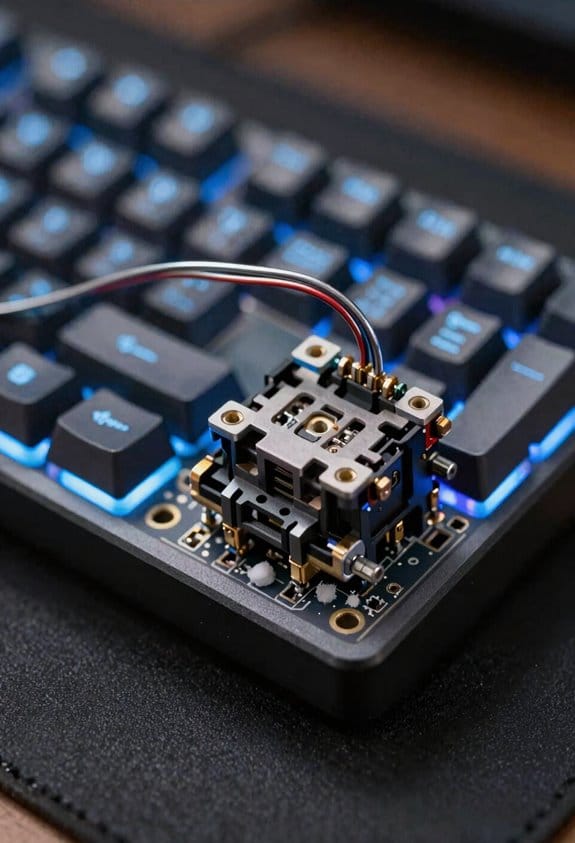
After fixing the clipping and alignment issues, I move on to testing and fine‑tuning the stabilizers to achieve silent, smooth typing; a quick audible test with a keycap removed lets me hear any remaining rattle, so I press the key repeatedly while listening for a faint “clack” that indicates wire‑to‑housing contact, then I adjust the lube amount—adding a nanoliter‑scale drop of Krytox 205g0 on each stem wall if the sound persists, or wiping away a microliter if the feel becomes sluggish—while keeping the total lubrication under 0.5 mg per stabilizer to avoid excess drag, and I verify the result by measuring the key travel with a digital caliper (should be 2.0 mm ± 0.05 mm) and confirming that the actuation force stays within 45 ± 5 g, which guarantees the keyboard remains responsive without sacrificing quietness. I conduct sound comparisons by recording the pre‑lubricated and post‑lubricated keystrokes, then run a force profiling routine using a calibrated load cell to plot actuation force versus travel, ensuring the curve remains linear and the peak force does not exceed the 45 ± 5 g target, thereby confirming both acoustic and tactile improvements.
Frequently Asked Questions
Can I Use Regular Oil Instead of Krytox for Stabilizers?
I’d avoid regular oil; it’s too thin and can attract dust. Instead, try vegetable oil or sewing‑machine oil for a cheap, thicker alternative, but expect less durability than Krytox.
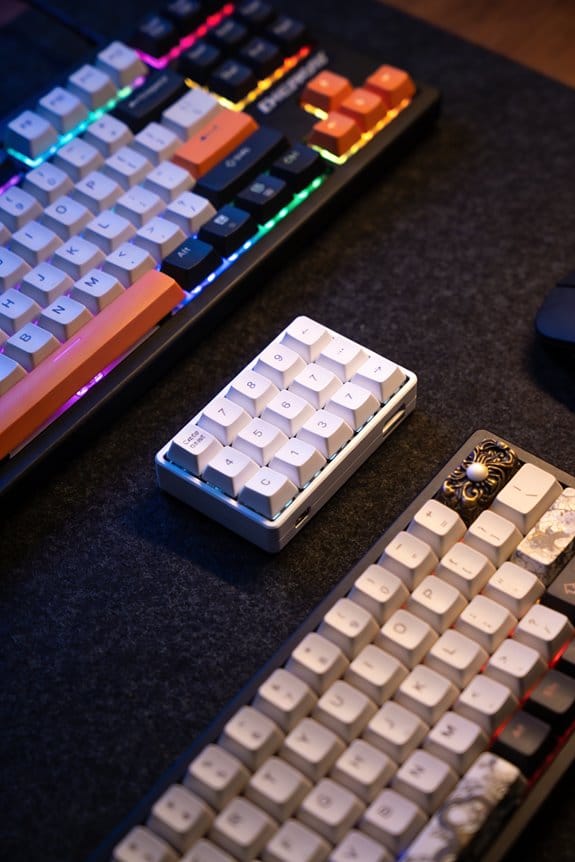
Do I Need to Remove Keycaps Before Lubing?
Should I strip the keyboard first? I say yes—remove the keycaps for clear switch access, then you can disassemble and lube the stabilizers without hassle.
Will Lubing Affect My Keyboard’s Warranty?
I’d say it could void your warranty if you ignore manufacturer guidance, so check the warranty terms first; many brands consider any disassembly or lubrication as warranty‑voiding, even if you’re careful.
How Often Should I Re‑Apply Lubricant?
I re‑apply lubricant roughly every six months, aligning with a maintenance schedule and doing seasonal checks; this keeps the stabilizers smooth, prevents rattle, and avoids buildup that could hinder performance.
Can I Lube Stabilizers on a Hot‑Swap Board Without Desoldering?
I’ll tell you you can lube stabilizers on a hot‑swap board, but first make sure the stabilizer retention is solid; otherwise the wire wobble won’t dampen properly, and the lube won’t stay.