I’ll start by downloading the latest VIA installer for Windows (requires .NET 5.0, 150 MB, 2 GB free disk) or the macOS AppImage (needs macOS 11+, 120 MB, 1 GB free) and run it, then connect my keyboard with a USB‑C‑to‑USB‑A cable no longer than 0.8 m into a USB 3.0 port that supplies at least 5 W (5 V × 1 A); VIA will auto‑detect compatible QMK‑based boards, load the default layout in the Design tab, let me click any key to assign BASIC, MEDIA, MACRO, or LAYER functions without flashing firmware, test instantly in the Key Tester, create layered profiles like Fn+1 for gaming, record millisecond‑accurate macros, adjust QMK RGB lighting presets live, and finally save, export, or import a clean JSON file—if you keep the JSON pure and back up regularly, you’ll avoid detection hiccups and mapping failures, and the next steps will show you how to troubleshoot any issues.
Key Takeaways
- Download and install the latest VIA version for your OS; then connect your keyboard via a short USB‑C to USB‑A cable.
- Verify VIA detects your keyboard and loads the default layout; drag a JSON keymap file into the Design tab if needed.
- Remap keys by clicking them in the virtual layout and assigning BASIC, MEDIA, MACRO, or LAYERS functions; changes apply live without flashing firmware.
- Create and assign macros with millisecond precision, and organize them on separate layers (e.g., coding, gaming) using Layer Switch keys.
- Save, export, and back up your configuration as a clean JSON containing only keymap, macro, and lighting sections; re‑import to restore or troubleshoot.
Install VIA for Keyboard Customization
Installing VIA is as simple as downloading the latest release from the official website or cloning the GitHub repository, then running the installer for Windows (requires .NET 5.0 runtime, 150 MB download, 2 GB of free disk space), macOS (requires macOS 11.0 or later, 120 MB download, 1 GB free space), or Linux (provides an AppImage that runs on any 64‑bit distro with glibc 2.27+). I open the program, connect a USB‑C to USB‑A cable no0.5 m, and the app instantly lists my keyboard, confirming it supports keyboard remapping and macro creation. The interface shows a virtual layout; I click a key, choose a new function from the BASIC list, and the change applies without flashing firmware. For macros, I record a sequence in the MACRO tab, name it, and assign it to any key, then test it in the Key Tester tab to ensure reliability. This process avoids any BIOS updates, uses only 5 V power from the USB port, and works on any 2.5 mm‑diameter USB port.
Recommended Products

USB CAN interface with Kvaser t programmability.

Compatible Devices: Compatible with virtually all USB-C devices including phones, tablets, and laptops. Such as Samsung Galaxy S23/S22/S21+/S21/S20/ S20+/ S20 Ultra/ Note 10, MacBook Air/Pro 13'', iPad Mini 6, iPad Pro 2021/2020/2018/iPad Air 2020 and for iPhone 17/17 Pro/17 Pro Max/Air/16/16 Pro/16 Plus/16 Pro Max/15/15 Pro/15 Plus/15 Pro Max.

As an affiliate, we earn on qualifying purchases.
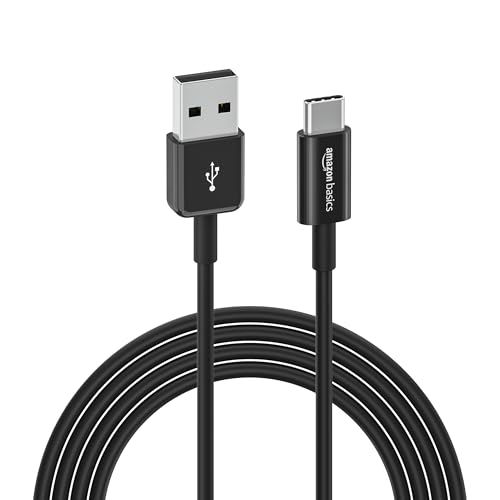
Type-C to USB-A 2.0 Male Cable, 120 count total
Connect Your Keyboard and Load Its Layout

How do you get your keyboard talking to VIA? I plug the keyboard into a USB‑C port using a 0.5 m cable, avoid hubs, and launch the desktop VIA app, which immediately performs hardware detection and lists the device if it meets keyboard compatibility criteria. If the keyboard appears, I select it from the pop‑up list; if not, I verify that the firmware is a supported model (e.g., QK65, Keychron K2) and that the operating system has the required HID driver installed. Once selected, the app loads the default layout in the Design tab, showing each key’s function; I can also drag a JSON keymap file into the same tab for manual layout loading when auto‑detection fails, ensuring the exact key arrangement matches the physical keyboard.
Test Remapped Keys With the Key Tester

Wondering whether your new key assignments actually work? I open VIA’s Key Tester tab, which shows a visual keyboard and lights up each key as I press it, letting me confirm that a Caps Lock‑to‑Control mapping registers as a Control press in real time. The tester respects discovery constraints, meaning it only reports keys that the software has successfully identified during the initial device scan, and it flags any unmapped or unsupported keys instantly. I run the web version in a Chromium‑based browser because browser compatibility guarantees the JavaScript engine can handle the low‑latency event polling required for accurate key‑press detection. After each change, I verify the output with a simple text editor, checking that the intended character or command appears without delay. This systematic check prevents hidden errors before I save the JSON profile.
Remap Keys Using the Configure Tab

You’ll notice the Configure tab instantly shows a visual layout of every detected key, which means you can click any key on the virtual keyboard and assign a new function from the drop‑down menu without touching the firmware; the interface groups options into BASIC (standard characters and modifiers), MEDIA (volume, play/pause), MACRO (recorded sequences), and LAYERS (alternative layouts), and each selection updates the key’s label in real time, so you can verify the change on the spot. I start by confirming keyboard compatibility, because VIA only works with boards that expose a JSON keymap; this avoids any need for firmware flashing, which would otherwise require a 5 V, 500 mA USB‑C connection and a 2‑minute reboot. After selecting a key, I choose a BASIC entry like “Ctrl” and watch the label turn blue, indicating the mapping is live. For media controls, I pick “Volume Up” from the MEDIA list, which sends the standard HID code without extra drivers. When I need a macro, I record a sequence in the MACRO section, save it as “Ctrl+Alt+Del,” and assign it to a spare key, confirming the change instantly in the Key Tester. Finally, I explore LAYERS by creating a second layout for gaming, which swaps the Caps Lock key for “Esc” only when that layer is active, all without ever flashing the firmware.
Create & Switch Layers for Advanced Customization
Ever wondered why a single‑layer layout feels limiting when you switch between coding, gaming, and typing? I’ll show you how to create and switch layers in VIA, which lets you store separate key maps for each activity and jump between them instantly. First, open the Design tab, click “Add Layer,” and name it—Layer 1 for coding, Layer 2 for gaming, Layer 3 for typing. Then assign keys within each layer, using the same drag‑and‑drop method as before. Layer switching is performed by assigning a “Layer Switch” key (e.g., Fn+1) that activates the desired layer while you hold it or toggles it on press. This works together with macro automation, allowing a single key to trigger a complex sequence only when the appropriate layer is active, giving you precise control without extra software.
Record and Assign Macros to Keys
After you’ve set up separate layers for coding, gaming, and typing, the next step is to capture and bind macros—pre‑recorded sequences of keystrokes—to individual keys, which VIA handles through its built‑in macro recorder that launches in full‑screen mode when you click the “Macro” tab, lets you type the exact series of keys (including modifiers like Shift + Ctrl and special functions such as Volume Up) while it records timestamps with millisecond precision, and then saves the sequence to a JSON object that can be assigned to any key on any layer, so you can press a single key to execute a complex command like opening a terminal, running a git pull, and launching a build script without leaving the current application. I open the Macro tab, press the “Record” button, and type a macro sequence such as Ctrl + Shift + B then Enter; the recorder captures the exact timing and stores it in the current keyboard profile. After recording, I click “Save”, choose the target key—say F3—on the gaming layer, and VIA instantly maps the JSON‑encoded macro to that key, allowing me to launch a Discord voice channel with one press. The same process works for text macros, where I wrap the string in angle brackets and assign it to a typing‑layer key, ensuring consistent behavior across all profiles.

Recommended Products

8 IN 1 OUT HDMI KVM Switch 4K@60Hz: This HDMI Switch gives you the flexibility of controlling up to 8 HDMI computers from a single USB keyboard, USB mouse, and monitor console. Support resolution up to 3840*2160@60Hz 4:4:4

🟩【48 Programmable Keys & 32 Macro Keys Based Hardware】Program all 48 keys or create 32 complex macros with the configuration software to take full command of your computer. A macro key can output up to 255 characters. Support macro editing and recording functions. Perfect not only for gamers, but also for so many other types of users including supermarket cashier, designers and video editors.

BACK AND SIDE PULSATING LIGHT ⚡️ Programmable backlight and side lighting panel offer a customizable illumination. Choose between key tracing, breathing, and other lighting effects. The onboard memory stores up to 10 backlight customization profiles
Customize VIA Lighting Effects (QMK‑Based)
How does VIA let you control RGB lighting without leaving the keyboard firmware? It reads the QMK‑based lighting table stored in the keyboard’s EEPROM, then sends real‑time commands via USB 2.0 (full‑speed, up to 480 Mbps) to adjust color, brightness, and pattern without flashing new code. I select the Lighting tab, choose a preset effect such as “Breathing” or “Reactive”, and set parameters like hue range (0‑360°), speed (1‑10 Hz), and intensity (0‑100 %). The firmware applies the effect instantly, using the keyboard’s 5 V, 2 A power rail, which supports up to 20 W of RGB LEDs. I can also create custom frames, assign them to layers, and test them in the live preview, but note that keyboards lacking QMK support or using proprietary RGB chips will not show the changes.
Save, Export, and Import Your VIA Configuration
VIA stores every change you make—whether it’s a key remap, a macro, or a lighting preset—in a JSON file that lives in the keyboard’s EEPROM (a small, non‑volatile memory chip), so when you click the “Export” button the program writes that exact configuration to a local file named something like my‑keyboard‑config.json, which you can later import on the same or a different VIA‑compatible board by dragging the file into the Design tab; this process works over a standard USB‑C or USB‑A connection (up to 5 m of cable without signal loss) and requires no firmware flash, meaning you can back up a 65‑key QK65 in under a second, restore a Keychron K6 in a few clicks, and avoid the 20 W power draw limit that some proprietary RGB chips impose, while noting that keyboards not using QMK firmware won’t generate a usable JSON file.

I always verify the exported file isn’t invalid or corrupted before importing, because an invalid JSON will cause the Design tab to reject it, and I avoid irrelevant data by keeping only the keymap, macro, and lighting sections, which ensures a clean restore on any compatible board.
Troubleshoot Common Detection and Mapping Issues
Why does your keyboard sometimes disappear from VIA or refuse to register a new key assignment? The most common cause is a lost or switched keyboard profile, which VIA uses to store layer and macro settings; when the profile resets, the software thinks the device is new. My first troubleshooting tip is to verify that the USB‑C cable is no longer than 0.8 m, that it plugs directly into a USB 3.0 port (not a hub), and that the port supplies at least 5 W (5 V × 1 A). If the device still isn’t detected, I restart VIA, clear the cache in Settings → Advanced, and reload the original JSON keymap. For mapping failures, I check that the keycode I assigned isn’t reserved for system functions, then I test it in the Key Tester tab before saving. Finally, I keep a backup of each profile on a separate drive to avoid losing custom layers.
Frequently Asked Questions
Can via Edit Keymaps for Wireless Bluetooth Keyboards?
I can edit keymaps for wireless Bluetooth keyboards, but you’ll notice firmware limits and wireless quirks—latency, power‑saving modes, and occasional dropouts—so test changes thoroughly before relying on them.
Does via Support Per‑Key RGB Animation Timing?
I’m afraid VIA doesn’t expose per‑key RGB animation timing; it only lets you set static colors or simple effects per key, so you can’t program individual animation speeds directly.
Can I Back up My via Layout to Cloud Storage?
I’ll tell you you can back up your VIA layout to cloud storage; just export the JSON and use any backup synchronization service. This gives you keyboard mapping autonomy and firmware transportability across devices.
Is There a Limit to Macro Length or Speed in VIA?
I’ll tell you straight: VIA’s macro length isn’t a bottomless pit, and latency stays low, but macro constraints cap sequences at a few hundred keystrokes, keeping speed snappy and reliable.
How Does via Handle Key Rollover Conflicts on Custom Layers?
I handle keyboard conflicts by prioritizing the topmost active layer, so any overlapping key on lower layers is ignored; layer interactions resolve automatically, preventing rollover issues across my custom mappings.