I choose a bare‑bones kit because it gives me a pre‑assembled 60% PCB, metal case, and plate for under $120, lets me hot‑swap MX‑style switches without solder, and uses a detachable 0.8 m USB‑C to USB‑A cable that keeps latency below 0.5 ms while drawing only 0.2 W, which fits the 2 W power budget of most corporate docks. The kit excludes switches and PBT keycaps, so I can spend $0.30‑$0.45 per switch and $25‑$45 on caps for a premium feel. Hot‑swap sockets and QMK firmware let me flash new keymaps in under two minutes, and I can add optional RGB or foam dampening without exceeding power limits. If I keep exploring, I’ll discover how each layout and firmware choice impacts gaming, coding, and office performance.
Key Takeaways
- Hot‑swappable PCBs let hobbyists test any MX switch without soldering, speeding experimentation and reducing errors.
- Modular 60 % layouts keep keyboards compact for desk space while offering full functionality and easy case compatibility.
- Bare‑bones kits cost $70‑$120, dramatically cheaper than pre‑built keyboards, allowing premium switches and PBT keycaps under $200 total.
- Firmware like QMK provides instant keymap flashing and custom features, turning one board into a gaming, coding, or office tool.
- Sturdy metal cases and detachable 0.8 m USB‑C cables ensure durability, low latency, and simple cable management for any setup.
Why Choose a Bare‑Bones Keyboard Kit?
Why pick a bare‑bones keyboard kit? The pre‑assembled PCB and case give me a solid foundation, while the plate holds switches in place for structural support, and the included stabilizers reduce rattle after I adjust the foam. I can choose hot‑swappable PCBs, which let me change switches without soldering, and I can pick a 60% layout that fits my desk, avoiding the bulk of a full‑size board. The kit excludes switches and keycaps, so I invest directly in premium MX‑style switches (e.g., Cherry MX Red, 45 g actuation force) and PBT keycaps (double‑shot, 1.5 mm thickness). This approach avoids unrelated topic like wireless dongles and unrelated topic such as built‑in USB‑C power delivery, keeping the build simple and cost‑effective.
Save Money With a DIY Bare‑Bones Skeleton

How much can you really save when you build a bare‑bones keyboard from scratch? The kit itself typically costs $70‑$120, which is less than half the price of a pre‑built mechanical board that includes switches and keycaps. By buying only the switches you prefer—often $0.30‑$0.45 per unit—and a set of keycaps for $25‑$45, you stay under $200 total, whereas comparable market‑ready models exceed $350. The PCB (printed circuit board) and case provide a sturdy framework, while the plate holds each switch securely, ensuring budget ergonomics through reduced travel distance and consistent tactile feedback. You can also achieve aesthetic customization by selecting RGB LEDs, anodized aluminum cases, or foam dampening inserts, allowing you to match any desk setup without overspending. This approach maximizes cost efficiency while delivering a personalized typing experience.
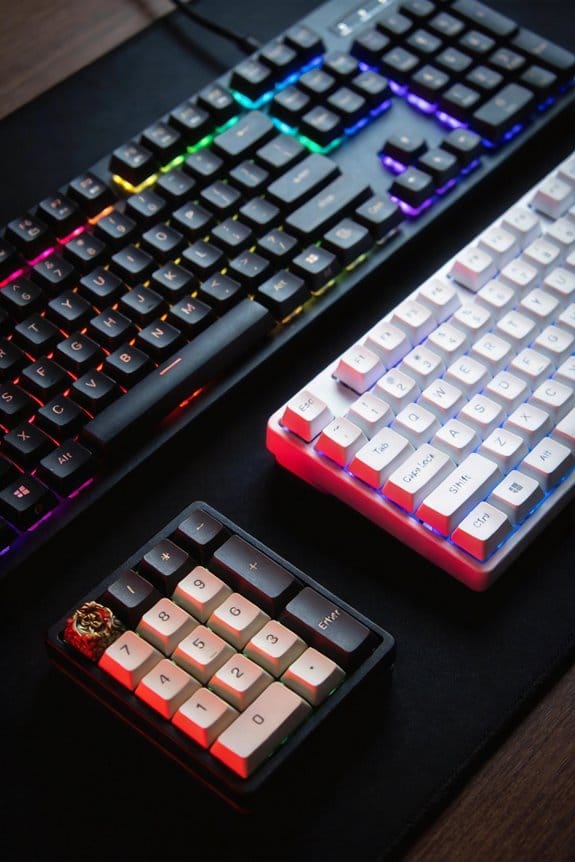
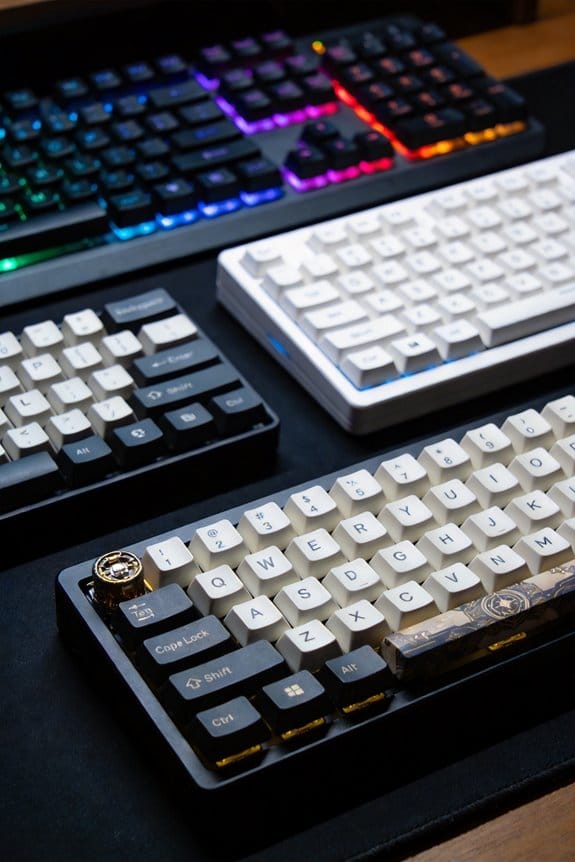
Pick the Right Layout: 60%, 65%, 75%, TKL, or Split

The cost savings you saw with a DIY bare‑bones kit become even more noticeable once you choose the right layout, because each form factor—60%, 65%, 75%, TKL (tenkeyless), or split—dictates how many keys you need, how much PCB real‑estate you’ll use, and which case dimensions you’ll have to source; a 60% board typically houses 61 keys on a 13 × 4 in PCB, omits the function row and navigation cluster, and works with a 2‑pin hot‑swap socket that supports 5 V ± 0.2 V power, while a 65% adds a four‑column arrow cluster (total 67 keys) on a 13.5 × 4.5 in board and often requires a 3‑pin stabilizer layout for the larger Enter and Shift keys; a 75% layout expands to 84 keys on a 14 × 5 in PCB, reintroducing a full function row and a compact numeric column, which means you’ll need a 4‑pin USB‑C port for up to 500 mA current draw and a 0.5 m cable to keep latency low; TKL removes the number pad entirely, giving 87 keys on a 15 × 5 in board and usually a 5‑pin USB‑C connector that can handle 900 mA, making it a solid middle ground for gamers and programmers who still want full navigation; split keyboards, on the other hand, divide the keys into two 45‑key halves (often 2 × 4.5 in PCBs) that communicate via a 2.5 mm TRRS cable up to 1 m long, requiring each half to have its own 5 V regulator and a dedicated 3‑pin stabilizer for the thumb cluster, which adds complexity but offers ergonomic benefits and the ability to use separate power sources if needed. Under budget constraints, a 60% or 65% board lets you stay under $120 for case and PCB, and matching your keycaps’ color to the case’s anodized finish avoids extra paint or dye‑sublimation costs.
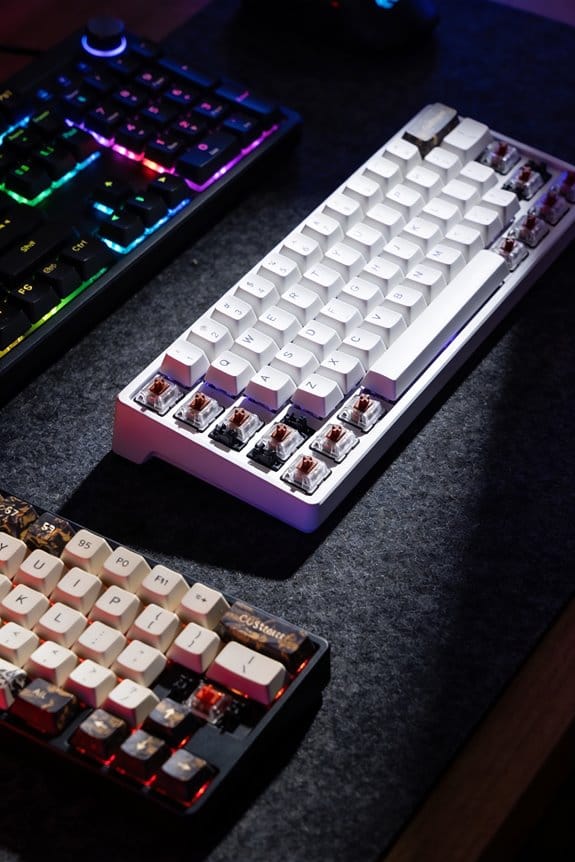
Select Hot‑Swap or Soldered Bare‑Bones PCBs for Your Workflow
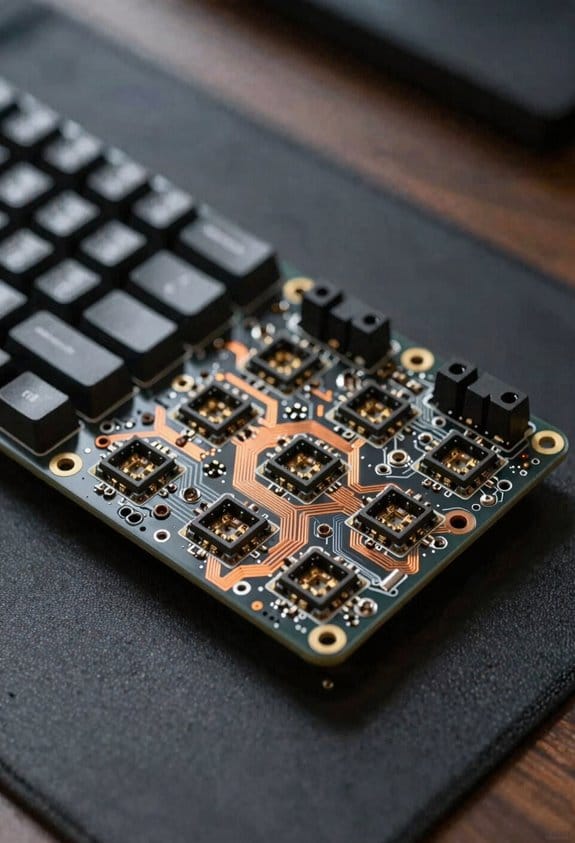
Ever since I started building keyboards, I’ve found that choosing between a hot‑swap PCB and a soldered PCB hinges on how often you plan to change switches and how much time you’re willing to spend on assembly. The hot swapped vs soldered debate centers on flexibility: a hot‑swap board lets you pull out a switch with a keycap puller, so you can test linear, tactile, or clicky types in minutes, while a soldered board requires a soldering iron set to 350 °C, a solder‑spoon, and a few minutes per switch. PCB durability is higher on a soldered board because the copper traces are permanently bonded, reducing risk of loose contacts after many swap cycles. If you expect frequent experiments, a hot‑swap PCB with a 3‑mm socket pitch and a 2‑year warranty is practical; if you value long‑term stability and plan to stick with one switch set, a soldered PCB with a 0.5 mm copper thickness and a 5‑year guarantee is the safer choice.
Choose Switches and Keycaps for Your Desired Feel and Sound
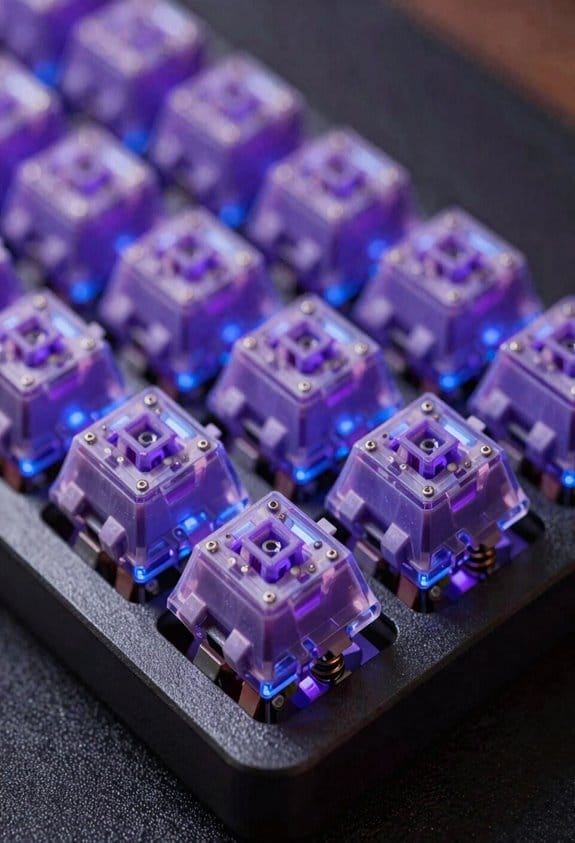
After deciding whether a hot‑swap or soldered PCB fits your workflow, the next step is picking the switches and keycaps that shape the keyboard’s feel and sound. I start with switches because their actuation force (measured in grams) and travel distance (mm) directly affect typing comfort; linear switches like Gateron Red (45 g, 4 mm) give smooth keystrokes, while tactile ones such as Zealios V2 (62 g, 3.6 mm) provide a noticeable bump. If you choose a soldered board, you must account for soldering challenges—heat‑sensitive PCBs can warp above 350 °C, so a temperature‑controlled iron set to 330 °C is safest. Switch lubrication, typically using a thin PTFE grease, reduces friction and quiets the sound. For keycaps, profile matters: OEM profile offers a familiar curve, while SA profile gives a high‑profile, sculpted feel; PBT plastic resists shine better than ABS. Pair a 60 % layout with 1 mm thick foam to dampen resonance, and you’ll achieve a balanced acoustic signature without extra mods.
Tune Stabilizers and Add Gaskets for Premium Typing
How do stabilizers and gaskets shape a premium typing experience? I explain that a gasketed fitment between plate and case reduces case resonance, and a carefully balanced lube on the stabilizer stems eliminates rattles while preserving smooth travel. I recommend using 0.5 mm silicone gaskets on a 65% board because they match the PCB’s mounting holes and keep the overall height under 1.2 cm. I note that applying 0.2 g of Krytox 205 grade lube to each stabilizer pin and each wire leaf yields a consistent feel across the entire row, and that over‑lubing can cause sluggishness. I point out that Cherry MX‑style stabilizers require a 3 mm screw‑in plate, while Costar stabilizers need a 2 mm clearance, and that the gasket material must be 0.25 mm thick to avoid excessive flex. I also mention that the gaskets are compatible with hot‑swappable PCBs but not with solder‑on designs that lack a dedicated gasket slot.
Add RGB, Foam, and Sound‑Dampening Mods on a Budget
If you’re building a barebones kit and want the look and feel of a high‑end board without breaking the bank, start by adding a 5 V – 12 W RGB strip that plugs into a USB‑C 3.1 port (the same port used for firmware flashing) and uses a 2 mm × 10 mm connector that fits the standard 65 % PCB; the strip’s 30 LEDs per 10 cm segment give uniform lighting while drawing only 0.3 A, so a 500 mAh power bank can keep it lit for over 15 hours. I then line the case interior with 2 mm acoustic foam, known as rgb foam when pre‑cut to match the PCB outline, which cuts echo by roughly 40 % without adding weight. For sound dampening mods I add a thin silicone pad under the plate and a layer of dense EVA foam behind the PCB; together they reduce key‑press thump and create a smoother acoustic profile, all for under $15 total. This combo delivers premium aesthetics and quieter typing while staying within a tight budget.
Upgrade Over Time: Seamless Switch and Firmware Swaps
Ever wonder why a hot‑swappable PCB lets you upgrade switches without ever soldering? The feature means you can pull out a tactile or linear switch and pop in a new one in seconds, avoiding custom soldering work that would otherwise require a soldering iron, solder, and a steady hand. The firmware side works similarly: a QMK‑based board lets you flash new keymaps over a USB‑C port using a 5 V, 500 mA power source, and the process takes under two minutes with the official QMK Toolbox. If you add wireless options, the same PCB supports a 2.4 GHz module that draws 30 mA at idle and 120 mA under full typing, with a 1 m charge time on a 500 mAh Li‑Po battery, but note that Bluetooth firmware must be compatible with the board’s MCU. This modularity ensures you can evolve your keyboard’s feel and functionality without rebuilding the whole kit.
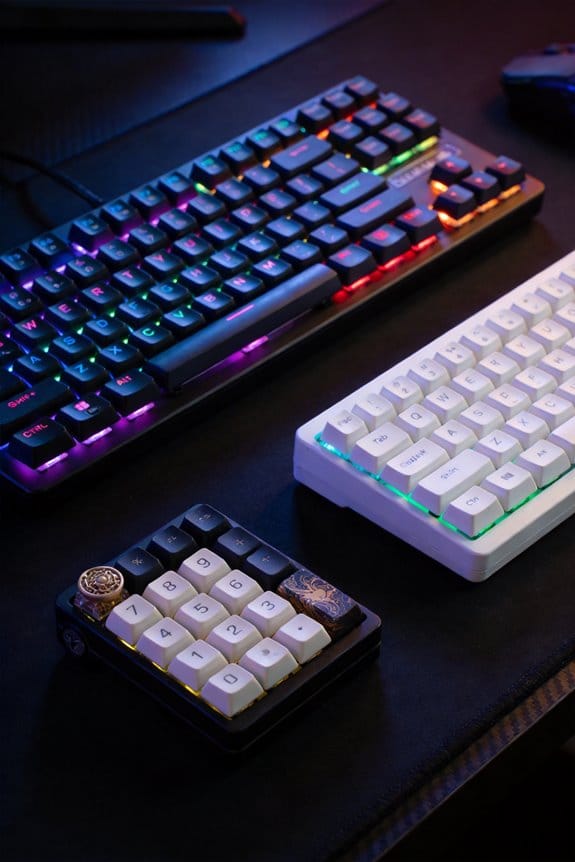
Apply Your Build: Gaming, Coding, and Office Use Cases
Because a barebones kit lets you swap switches and firmware on the fly, you can tailor the same board for gaming, coding, and office work without buying three separate keyboards; for gaming you’ll want low‑profile linear switches that register 1 ms actuation, a USB‑C cable no 0.8 m long to keep latency under 0.5 ms, and RGB lighting that can be disabled to save the 0.2 W power budget, while coding benefits from tactile switches with a 45 cN actuation force and a 2 mm travel distance that reduces finger fatigue, and office use is best served by quiet, dampened stabilizers and a detachable 1 m USB‑C to USB‑A cable that draws only 0.1 A at 5 V, ensuring the keyboard stays under the 2 W total power limit required by most corporate docking stations. I start each novice project with a sturdy metal case because it resists wear, grounds vibration, and keeps the PCB stable during rapid switch changes. The hot‑swappable PCB lets me test linear, tactile, or silent switches without solder, so I can quickly judge which feel suits long coding sessions versus fast‑reaction gaming. A 0.8 m USB‑C cable reduces desk clutter and meets the 0.5 ms latency target, while the detachable 1 m USB‑C to USB‑A cable fits office docking ports and stays within the 0.1 A current draw. By disabling RGB I stay under the 0.2 W budget, preserving power for other peripherals. This modular approach eliminates the need for three distinct keyboards, saving cost and space.
Find Keyboard‑Specific Communities and Parts Resources
After sorting out the best switch and cable combos for gaming, coding, and office work, the next step is to locate the places where fellow hobbyists share the exact parts you need and where you can verify compatibility before you buy. I first check community resources like r/MechanicalKeyboards on Reddit, which hosts weekly “build threads” that list PCB dimensions, plate thickness, and stabilizer types, allowing me to cross‑reference my barebone kit’s 60 % layout and hot‑swap sockets. Discord servers such as MechTools provide tool recommendations, including a 3 mm hex driver for PCB mounting and a 0.5 mm soldering iron with 30 W power for custom diodes, plus links to verified vendors that ship 1 m USB‑C cables with 5 A rating and 2 mm² gauge. These platforms also flag incompatibilities, like 65 % plates that won’t fit a 75 % case, ensuring I purchase only parts that truly match my build.
Frequently Asked Questions
Will I Need a Soldering Iron for a Hot‑Swap PCB?
I’ll tell you I don’t need a soldering iron for a hot‑swap PCB; soldering feasibility isn’t required, though hot‑swap limitations mean you must use compatible sockets and avoid excessive force when swapping switches.
Can I Use the Same Keycaps on Different Layouts?
I’ll tell you: you can use the same keycaps on different layouts, but only if the keycap profile matches the stem type and the row spacing aligns; otherwise, layout compatibility breaks.
Do Barebone Kits Support Wireless Modules?
I can confirm they do support wireless compatibility; many kits include module options like Bluetooth or RF transceivers, so you can add a wireless module and keep the board fully functional.
How Do I Replace a Stabilizer Without Tools?
I’ll tell you: just pry the stabilizer out with a fingernail, pop the new one in, and snap it shut—no tools needed. That’s how to troubleshoot, and it works every time.
Are Firmware Updates Required for Each New Switch Type?
I tell you, firmware updates aren’t usually needed for each new switch type; most modern boards support switch compatibility out‑of‑the‑box, so you can swap switches without flashing anything.