I start by gathering a compact kit: a 5 ml syringe of Krytox GPL 205 grade 0, a 0.5 mm (30‑gauge) needle, anti‑static 12‑inch tweezers with a 0.8 mm tip, a 2 mm soft‑bristled brush, lint‑free 30 × 30 mm tissue, and 70 % isopropyl‑alcohol wipes. I wipe the stabilizer housing and thin wire with the alcohol‑damped tissue, let it air‑dry for 30 seconds, then brush away any remaining dust without disturbing factory grease. I press the needle into the housing hole, dispense a controlled droplet of Krytox, watch it spread uniformly along the wire, and wipe excess with lint‑free tissue. I test the stem’s up‑and‑down travel, remove any oily film, and reinstall keycaps, confirming a quiet, consistent “thock.” If you keep going, you’ll discover the finer tweaks that perfect the process.
Key Takeaways
- Gather a compact toolkit: 2 mm syringe, 0.5 mm needle, Krytox or dielectric grease, anti‑static tweezers, soft brush, lint‑free tissue, and 70 % isopropyl alcohol wipes.
- Clean the stabilizer housing and wire with alcohol‑damped tissue, then brush away residue; let air‑dry at least 30 seconds.
- Apply grease using a 0.5 mL syringe with a 30‑gauge needle, filling the housing gap and allowing a thin, uniform film along the wire.
- Test stem movement, wiping excess grease with lint‑free tissue until the housing and stem are free of oily film.
- Reinstall keycaps, ensure proper alignment and click‑in, then perform a quiet‑typing test to confirm smooth, silent operation.
Gather Tools for Desolder‑Free Stabilizer Lubing
What you need to start a desolder‑free stabilizer lubing session is a compact, well‑organized toolkit that lets you clean and apply grease without opening the switch. I keep a small tray with a 2‑mm syringe, a 0.5‑mm needle, and a 5‑ml bottle of Krytox GPL 205 grade 0, which is a thick, non‑conductive grease that stays put. A pair of anti‑static tweezers (12‑inch, 0.8 mm tip) lets me lift stems without damaging wires, while a soft‑bristled paintbrush (2 mm width) spreads lube evenly. I also use a lint‑free tissue (30 mm × 30 mm) and a 70 % isopropyl alcohol wipe for cleaning. Unrelated topic: a spare USB‑C cable (0.9 m, 5 V / 3 A) helps power a small LED light if the workspace is dark. Off topic: a paperclip can pry a stuck keycap, but it’s not needed for lubing.
Recommended Products

Krytox GPL Oils are completely nonflammable They will not burn even in 100% liquid or gaseous oxygen and are compatible with all elastomeric seal materials and engineering plastics

A high performance grease utilizing PFPE oil and thickened with PTFE powder
As an affiliate, we earn on qualifying purchases.

Best for Extreme Pressure Applications Contains Molybdenum Disulfide Temp Range -30C thru 288C Viscosity 42cSt/100C 400cSt/40C Stable in a wide variety of operating conditions/environments
Clean Stabilizer Housing and Wire Carefully

After gathering the syringe, tweezers, and lint‑free tissue, I start by wiping the stabilizer housing and its thin wire with a 70 % isopropyl‑alcohol‑dapped tissue, because the alcohol dissolves dust and polymer residue while evaporating quickly, leaving no conductive film; I make sure the tissue is dry before moving on, then I use a soft‑bristled paintbrush to gently sweep any remaining particles out of the housing’s white plastic shell and the wire’s copper coil, taking care not to disturb the factory‑applied grease if I plan to preserve it, and I finish by letting the components air‑dry for at least 30 seconds to guarantee the surface is completely moisture‑free before any lube is introduced. I avoid irrelevant chatter and unrelated tangents, focusing on the exact sequence: alcohol contact, brush sweep, and dry time. This method ensures the metal wire and polymer housing are clean, preventing future friction and preserving electrical neutrality.
Recommended Products

High Purity: Our alcohol wipes are made with 96% isopropyl alcohol, ensuring superior cleaning power for all your electronic wipes needs. Ideal for environments requiring high standards of cleanliness, such as cleanrooms and labs.

PERFECT FOR ALL SCREENS AND ANTI-GLARE COATINGS – iCloth wipes effectively clean all types of screens with an ultra-pure formula of 70% isopropyl alcohol (IPA) and deionized water, ensuring no damage to sensitive coatings on smartphones, laptops, computer monitors, car touchscreens, and other electronics.

PERFECT FOR ALL SCREENS & ELECTRONICS – iCloth wipes effectively clean keyboards, laptops, computer monitors, and TV screens. Their ultra-pure formula, made with 70% isopropyl alcohol (IPA) and deionized water, ensures no damage to sensitive coatings and leaves no residue.
Apply Krytox or Dielectric Grease Precisely

How can you get a thin, even coat of Krytox or dielectric grease onto the stabilizer wire and housing without creating mess? I use a 0.5 mL syringe with a 30‑gauge needle, because the tiny opening lets me inject a controlled droplet directly into the wire cavity, avoiding the wrong technique of splattering lube with a brush. First I pull the stem fully with tweezers, then I insert the needle tip into the housing hole and press gently until the grease fills the gap, watching the liquid spread along the wire. After a few seconds I withdraw the needle and wipe any excess on a lint‑free tissue. I never pour leftover grease down the sink, as that is unsafe disposal; instead I seal it in a small container for later use. This method yields a uniform film, reduces friction, and keeps the workspace clean.
Recommended Products

Two (2) Tips: Precise brass needle for a fine line of grease and precise applications. Zerk fitting applicator for greasing Zerk (grease) fittings

As an affiliate, we earn on qualifying purchases.

Price For: Each Replaceable Tip: No Item: Reusable Glass Syringe Color: Clear Tip Material: Glass/Metal Body Material: Glass Type: Metal Luer Lock Capacity: 30 mL Country of Origin (subject to change): Italy
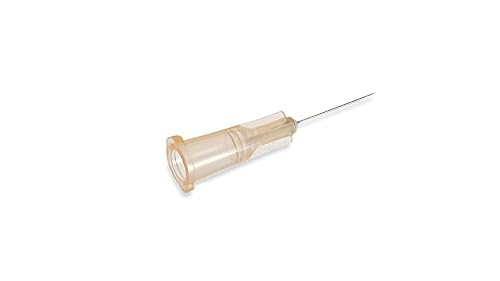
At BD, we have been developing needles and syringes for 125 years and stand as the U.S. segment leader
Test Stem Movement and Remove Excess Lube

Do you notice the stabilizer stem feeling gritty or sticking after lubing? I test movement by pulling the stem up and down, listening for smooth travel and checking that the wire slides without resistance, which confirms the de solder free stabilizer lubing worked as intended. Next, I perform excess lube removal using a lint‑free tissue, wiping the housing and stem area until no oily film remains, because leftover lube can attract dust and cause noise reduction issues. I also double‑check that the housing cleaning is complete, ensuring no residue blocks the wire. Finally, I perform keycap reinstallation, pressing each cap firmly to verify that the stem still moves freely and the typing sound is quiet and consistent.
Recommended Products

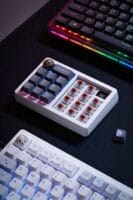
Unique gasket mount keyboard with silicone gasket, 3 dampening layers, and hot-swappable pre-lubed switches for an unrivaled typing experience

Tri-mode connectvity: Seamlessly connect to three devices via Bluetooth. Experience ultra-low latency gameplay with ROG SpeedNova wireless technology in 2.4 GHz RF mode (2000+ hours battery life with OLED & RGB off), or utilize a standard wired USB connection.
Temp Range: -51C thru 179C: Viscosity 9cSt/100C, 60cSt/40C; Stable in a wide variety of operating conditions/environments
Reinstall Keycaps and Verify Quiet Typing

Why not start by aligning each keycap with its corresponding stem, because a proper fit guarantees the stabilizer can’t re‑engage the housing and cause unwanted noise later on? I press the keycap down firmly, feeling the stabilizer mounting click into place, and I verify that the keycap compatibility matches the switch profile—OEM, Cherry, or SA—so the cap sits flush without wobble. I repeat the process across the entire row, checking that no lube residue remains on the underside of any cap, because excess lubricant can attract dust and re‑introduce rattling. After all caps are reinstalled, I perform a quiet‑typing test, listening for a consistent “thock” and confirming that each key returns to its neutral position without audible clatter. This final verification ensures the cleaning and lubing routine succeeded.
Frequently Asked Questions
Will I Need to Remove the PCB for Proper Stabilizer Cleaning?
I don’t think you need to remove the PCB; just use cleaning methods like alcohol wipes and a toothpick to clear debris. That’ll give you noise reduction without desoldering anything.
Can I Use Regular Oil Instead of Krytox?
I’d laugh if you thought regular oil works—cleaning myths say it’s fine, but lubrication basics demand Krytox; oil attracts dust, clogs wires, and ruins the smooth feel you actually want.
How Often Should I Re‑Lube My Stabilizers?
I usually re‑lube my stabilizers every three to six months, depending on usage, because regular stabilization maintenance keeps them smooth and quiet, preventing wear and rattling over time.
Will Lubing Affect Keycap Legends or Backlighting?
I’ve found lubing barely touches legends or backlighting—unless you drown the stabilizers, then you’ll hear stabilizer squeaks and see keycap wobble, but a light coat leaves everything pristine and silent.
Is It Safe to Lube Stabilizers on a Hot‑Swap Board?
I think it’s safe—stable switch lubrication works fine on hot‑swap boards, just ensure the lube you choose won’t melt or damage the sockets, and avoid excess that could seep into the PCB.