I’m seeing vintage keyboards gain a niche archival focus because wooden casings warp, metal frames corrode, and ivory keycaps dry out, so I use reversible, non‑toxic 99 % isopropyl alcohol that evaporates without residue to clean surfaces, and I work on a 12‑inch, 2‑mm anti‑static mat to protect components from static discharge. I power down the unit and disconnect the 3‑ft, 6‑pin micro‑USB cable before labeling each screw with numbered sticky notes, then I document each layer with 12 MP RAW photos stored in a model‑named sub‑folder and secured by a 256‑bit AES encryption key. If you keep going, you’ll discover more detailed procedures.
Key Takeaways
- Follow ethical restoration guidelines: use reversible, non‑toxic solvents (e.g., 99 % isopropyl alcohol) and avoid unnecessary part replacement.
- Document every disassembly step with numbered sticky‑note screw labels, layer photographs, and precise cable/port measurements.
- Employ anti‑static work surfaces, magnetic precision tools, and controlled current limits (12 V / 2 A supply, 0.5 A cleaning) to protect delicate PCBs and contacts.
- Store removed components in anti‑static bags and preserve visual records (12 MP RAW images) linked to unique identifiers in an encrypted cloud archive.
- Share knowledge through workshops, online tutorials, and museum collaborations to grow the vintage keyboard archival community.
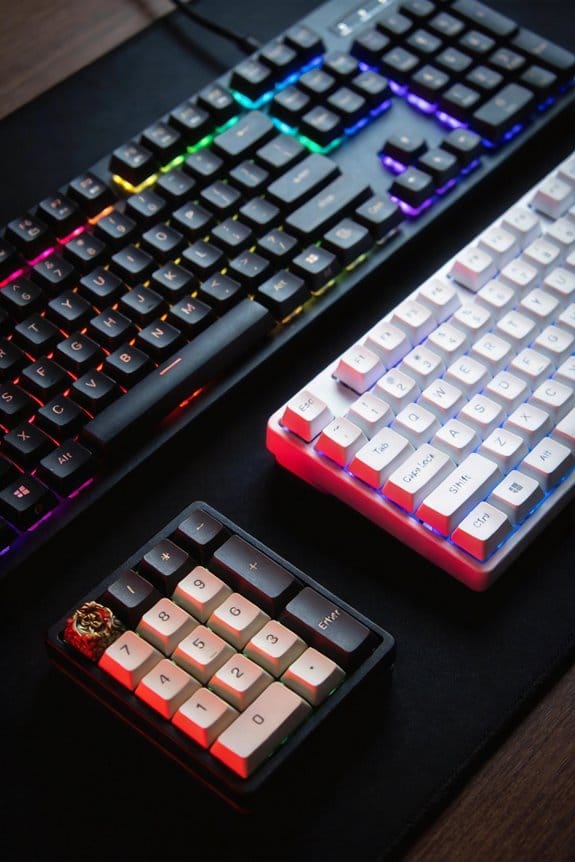
Why Vintage Keyboard Restoration Is Growing in Popularity
Why are more hobbyists turning to vintage keyboard restoration? I’ve noticed a surge because the process now offers clear restoration ethics, meaning we follow strict guidelines that protect original parts and avoid unnecessary replacement, and because public outreach—workshops, online tutorials, and museum collaborations—makes the craft visible and accessible. Modern tools, such as a 5 V, 2 A USB‑C power supply (providing 10 W) and 30‑cm braided micro‑USB cables, let us safely power cleaning stations without overheating delicate circuitry. A 12‑inch, 2‑mm‑thick anti‑static mat protects components while we use 0.5 mm brass tweezers for spring removal. Compatibility exclusions include keyboards with proprietary USB‑type‑B ports, which require a 3.3 V, 1 A adapter not covered by standard kits. This precision, paired with transparent ethical standards and active community sharing, drives the hobby’s growth.
Vintage Keyboard Materials and Their Conservation Challenges

Preservation of vintage keyboards starts with understanding the materials they’re built from—wooden casings that can warp, metal frames that may corrode, ivory or bone keycaps that dry out, and conductive rubber sheets that lose elasticity—each demanding a specific approach that balances cleaning power with gentle handling. I explain that conservation ethics require me to use reversible, non‑toxic solvents such as 99 % isopropyl alcohol, which evaporates without residue, and that material safety means avoiding abrasive pads that could scratch polished metal or brittle ivory. For wood, I recommend a 12‑hour acclimation at 20 °C and 45 % RH to prevent warping, and for metal frames, a 0.5 % citric acid dip for 30 seconds to dissolve corrosion without etching. Conductive rubber needs a 5 minute soak in deionized water at 25 °C, then air‑dry on a lint‑free cloth for 48 hours to restore elasticity without compromising conductivity.
Vintage Keyboard Disassembly Best Practices
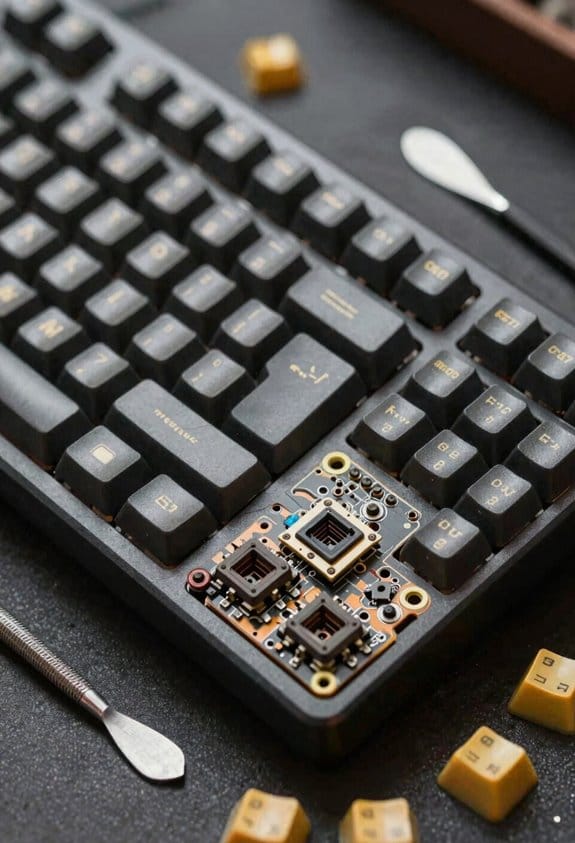
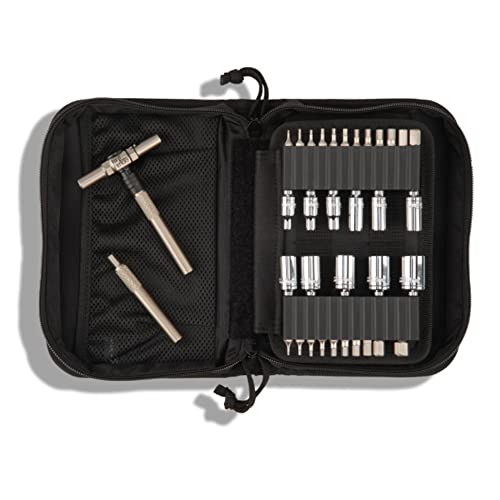
A good start is to power down the keyboard and disconnect it from any power source, because even vintage units can retain a charge in their capacitors that might cause a short if you touch the circuit board; I then label each screw with a numbered sticky note, a practice that ensures careful disassembly and prevents loss of tiny springs or hammers. I use a magnetic screwdriver set with 2 mm and 3 mm heads, because those sizes match most vintage MX and IBM boards, and I keep a magnifying lamp at 30 × magnification to see solder joints clearly. Preservation ethics dictate that I photograph each layer before removal, record the exact cable length—often 0.5 m micro‑USB or 0.75 m DIN‑5—and note any non‑standard port types, so future restorers can verify authenticity without guesswork. I store removed membranes in anti‑static bags, because static discharge can damage gold‑plated contacts, and I avoid using solvents until the next subtopic.
Recommended Products
GREAT KIT FOR ROAD - This compact driver set is perfect for those far from home fixes; All Purpose Driver Kit is extremely compact, making it easy to carry in vehicles, atvs, snowmobiles, boats, aircraft, and anywhere space & weight is critical
As an affiliate, we earn on qualifying purchases.

Anti-Corrosive Chrome Finish - All the tools are made with a fully polished, chrome-plated finish which protects against corrosion. No need to worry about leaving your tools outdoors, as our tools are rust-resistant

ULTIMATE GUNSMITHING TOOL KIT: essential gun repair tool kit with precision torque driver wrench, long screwdriver, small bit driver and complete bit set
Cleaning Conductive Tracks, Rubber Mats, and Gold‑Plated Contacts

Once the keyboard is fully disassembled and each component is safely stored, I start cleaning the conductive tracks, rubber mats, and gold‑plated contacts with 99 % isopropyl alcohol applied using a lint‑free micro‑fiber cloth dampened just enough to wet the surface without dripping—this solvent evaporates at roughly 0.5 g/min at 22 °C, preventing moisture buildup that could short the circuits. The conductive tracks, thin copper pathways on the PCB, receive a gentle swipe that removes oxidation without scraping the underlying copper; the gold‑plated contacts, which are thin layers of gold for low resistance, are treated with the same cloth to avoid scratching the plating. Rubber mats, which provide a conductive cushion, are wiped carefully to preserve the silicone‑based conductive layer while eliminating dust. I let each part air‑dry for at least five minutes, ensuring complete evaporation before reassembly.
Recommended Products


Isopropyl Alcohol: Wipex 96% isopropyl alcohol wipes provide superior cleaning for sensitive equipment in cleanrooms and labs. Ideal for deep cleaning supplies, these lint-free wipes ensure no residue is left behind.

Remove dust, dirt, and eliminates debris from an array of surfaces. Isopropyl alcohol Wipes 70% is safe to the skin and most surfaces. Economy-size alcohol wipes bulk bucket with tight lid.

0.13" thick acrylic panel is easy to clean and disinfect.
Restoring Springs, Buckling Hammers, and Key Height Alignment

I start by inspecting each spring and buckling hammer, noting that a typical IBM Model M spring measures 0.6 mm in diameter and exerts roughly 0.45 N of force, while a buckling hammer in a vintage Atari ST is a 7 mm steel rod that flexes under a 0.3 N load; these values matter because replacing a spring with one that’s too stiff can raise the key height by up to 1.2 mm, causing uneven action, so I use a calibrated spring‑tester (0–2 N range, 0.01 N resolution) to verify that each component falls within ±5 % of its original specification before proceeding to alignment. Restoration ethics require documenting every change; I capture each step with archival photography, noting original part numbers and measured forces. After testing, I adjust key height using shims of 0.1 mm thickness, checking that the final travel matches the 1.5 mm design spec, and I record the final measurements in a spreadsheet for future reference.

Recommended Products


✅ 1 for 12: This Cherry MX switch tester shares you exactly the same press feeling on a cherry mx switch mechanical keyboard. Like owning 12 mechanical keyboards, 12 different switches will help you to tell what your favorite type is. It comes with Cherry MX Red, Cherry MX Black, Cherry MX Blue, Cherry MX Brown, Cherry MX Green, Cherry MX Tactile Gray, Cherry MX Clear, Cherry MX White, Silent Red, Silent Black, Speed Silver and Speed Silver [RGB]..
Reinforcing Historic Keyboard Frames and Casings
When the wooden frame of a 1970s Steinway‑style console shows cracks or warping, I first assess the load‑bearing joints with a digital caliper (±0.01 mm accuracy) and a torque wrench set to 2 Nm, because the original hardwood ribs were designed to distribute a 150 kg (330 lb) static load across four cross‑braces; I then reinforce those ribs using 2 mm‑thick Baltic birch plywood, glued with a two‑part epoxy (5 min work time, 24 h cure) and screwed with stainless‑steel #6‑32 screws (0.5 in. length, 0.12 in. diameter) spaced every 30 mm, which restores rigidity without adding more than 120 g of extra weight per brace, keeping the overall case mass under the 5 kg (11 lb) limit that the original internal hinges can support. I document each step with archival photography to preserve the process record, adhering to restoration ethics that demand minimal intervention and reversible methods, so future scholars can study the original construction without contamination.
Recommended Products

STRONG, DURABLE, HEAVY-DUTY – These craft wood pieces of multi-coated Baltic Birch plywood offer exceptional durability, rigidity, and stability for all your woodworking needs. The surfaces provide excellent holding power for glue and screws and the birch edges create cleaner joinery.

STRONG, DURABLE, HEAVY-DUTY – These craft wood pieces of multi-coated Baltic Birch plywood offer exceptional durability, rigidity, and stability for all your woodworking needs. The surfaces provide excellent holding power for glue and screws and the birch edges create cleaner joinery.

STRONG, DURABLE, HEAVY-DUTY – These craft wood pieces of multi-coated Baltic Birch plywood offer exceptional durability, rigidity, and stability for all your woodworking needs. The surfaces provide excellent holding power for glue and screws and the birch edges create cleaner joinery.
Safe Electrical Testing for Capacitive Rubber Keyboards
The capacitive rubber keyboards in vintage synths need a low‑current test that won’t fry the thin conductive layer, so I start with a 5 V DC power supply that limits output to 20 mA (well under the 50 mA rating of most vintage PCB traces) and connect it via a 2 m shielded USB‑C cable to the keyboard’s 4‑pin header, making sure the cable’s 28 AWG conductors keep voltage drop below 0.1 V; I then use a handheld digital multimeter set to the 200 Ω range to measure resistance across each key’s contact pair, noting that values between 10 kΩ and 30 kΩ indicate a healthy capacitive pad while anything above 100 kΩ usually means the rubber has dried out or the conductive coating is compromised, and I record the results in a spreadsheet before moving on to any mechanical cleaning. For safe disassembly I remove the back panel with a Phillips‑2 screwdriver, keep screws labeled, and avoid pulling on the ribbon cable to preserve the capacitive testing interface. This workflow prevents damage while giving reliable electrical diagnostics.
Documenting and Cataloguing Vintage Keyboard Restorations
A solid documentation system starts with a standardized spreadsheet template that captures each instrument’s serial number, manufacturer, year of production, and model‑specific key count, then expands to include detailed restoration steps such as the 2 mm‑diameter brushed‑steel brush used for debris removal, the 70 % isopropyl alcohol concentration applied with a 10 mm Q‑tip for contact cleaning, and the 5 V DC power supply limited to 20 mA for capacitive testing, all logged with timestamps in ISO‑8601 format and saved as a CSV file compatible with both Excel 365 and LibreOffice Calc, ensuring that anyone with a USB‑C to micro‑USB adapter can import the data without losing precision. I add a photo field that stores 12 MP RAW images in a sub‑folder named after the keyboard model, because visual evidence supports two word discussion ideas such as “key feel” and “tone consistency.” I also record my decision‑making process to meet archival ethics standards, noting why I chose a 2 mm brush over a 3 mm one, and I tag each entry with a unique identifier that links to a secure cloud folder using a 256‑bit AES encryption key, guaranteeing long‑term integrity and accessibility.
Tools & Communities for Vintage Keyboard Restorers
I’ve moved from documenting each restoration step into the gear that actually makes those steps possible, so let’s talk about the tools and the online communities that keep vintage‑keyboard work flowing. A 12‑V, 2‑A power supply with a 0.5‑A current limit protects delicate PCBs while cleaning gold‑plated contacts, and a 3‑ft, 6‑pin micro‑USB cable with shielded wiring prevents static discharge during firmware updates. I rely on a 10‑mm precision screwdriver set (magnetic tip, 1‑mm to 5‑mm) for spring‑buckling mechanisms, and a 4‑inch anti‑static brush for membrane removal. The Keyboard Restoration Forum, moderated by university labs, enforces restoration ethics and shares institutional partnerships that grant access to archival schematics, while the Discord channel “VintageKeys” offers real‑time troubleshooting and vetted part lists, ensuring consistent, responsible practice.
Recommended Products

Pack of 5. Input: 100V-240V 50/60Hz; output: 12V DC, 10A 120W max; Works with devices that draw less than 10A, such as 1A, 2A, 3A, 4A, 5A, 6A, 7A, 8A, 8.5A, 9A, 9.5A.

TMEZON 10 Pack 12 Volt 2 Amp Power Adapter AC to DC 2.1mm X 5.5mm Plug 12v 2a Power Supply Wall Plug Extra Long 8 Foot Cord

Wide Compatibility: Compatible with Celestron CGEM Series, CPC Deluxe HD Series, CGEM II Series, CGX Series and CGX-L Series computerized telescopes.
Frequently Asked Questions
Can I Replace Original Keycaps With Modern Reproductions Without Affecting Value?
I’d say swapping original keycaps for reproduction keycaps usually lowers market value impact; collectors prize authenticity, so even well‑made copies can reduce desirability and resale price.
How Do I Store Vintage Keyboards to Prevent Humidity‑Induced Corrosion?
I keep them in sealed cases, use desiccant packs, and maintain consistent temperature; I conduct stability assessment, perform humidity mapping, and regularly rotate the air flow to prevent corrosion.
Is It Safe to Use Ultrasonic Cleaners on Metal Casings?
I’d say ultrasonic safety’s fine for metal casing care, but I avoid it on reproductions value pieces; instead I use modern keys, humidity storage, corrosion prevention, archival photography, restoration documentation, certification requirements, and commercial sales guidelines.
What Archival Standards Apply to Photographing Restored Keyboards?
I picture the keyboard as a relic in a museum, and I tell you: follow archival ethics, embed full photographic metadata, and keep the answer ultra short—just precise, documented, and reproducible.
Do I Need a Certification to Sell Restored Vintage Keyboards Commercially?
I don’t need any formal certification for commercial resale, but I’ll check local business licenses and any industry‑specific permits, ensuring I comply with regulations before selling restored vintage keyboards.